Typography & Fonts
Ghost offers multiple ways to customize the fonts used in your theme. You can either use Ghost’s built-in typography settings or add custom fonts manually.
Ghost Typography Settings
Ghost provides built-in typography customization through the admin panel. Here’s how to access these settings:
- Go to Settings → Site → Design & branding
- Click Customize
- Change fonts in Typography section

You can easily change both heading and body fonts using the native Ghost interface.
However, if you want to use custom fonts that are not available in Ghost’s curated selection, you can add them manually using Google Fonts or other sources.
To use custom fonts, make sure both “Heading font” and “Body font” are set to “Theme default” in Ghost’s Typography settings. This prevents Ghost from loading its fonts and allows your custom fonts to work properly.
Using Custom Google Fonts
By default, Aspect theme uses the self-hosted font named Geist. It is a modern sans-serif font carefully crafted for all screens. If you want to use Google Fonts instead, follow these steps:
Code Injection is required to add custom CSS.
- Open the Google Fonts website and select the font you want to use. For example, we will use Roboto for body and Oswald for headings.
- Add these fonts to collection using the Get font button

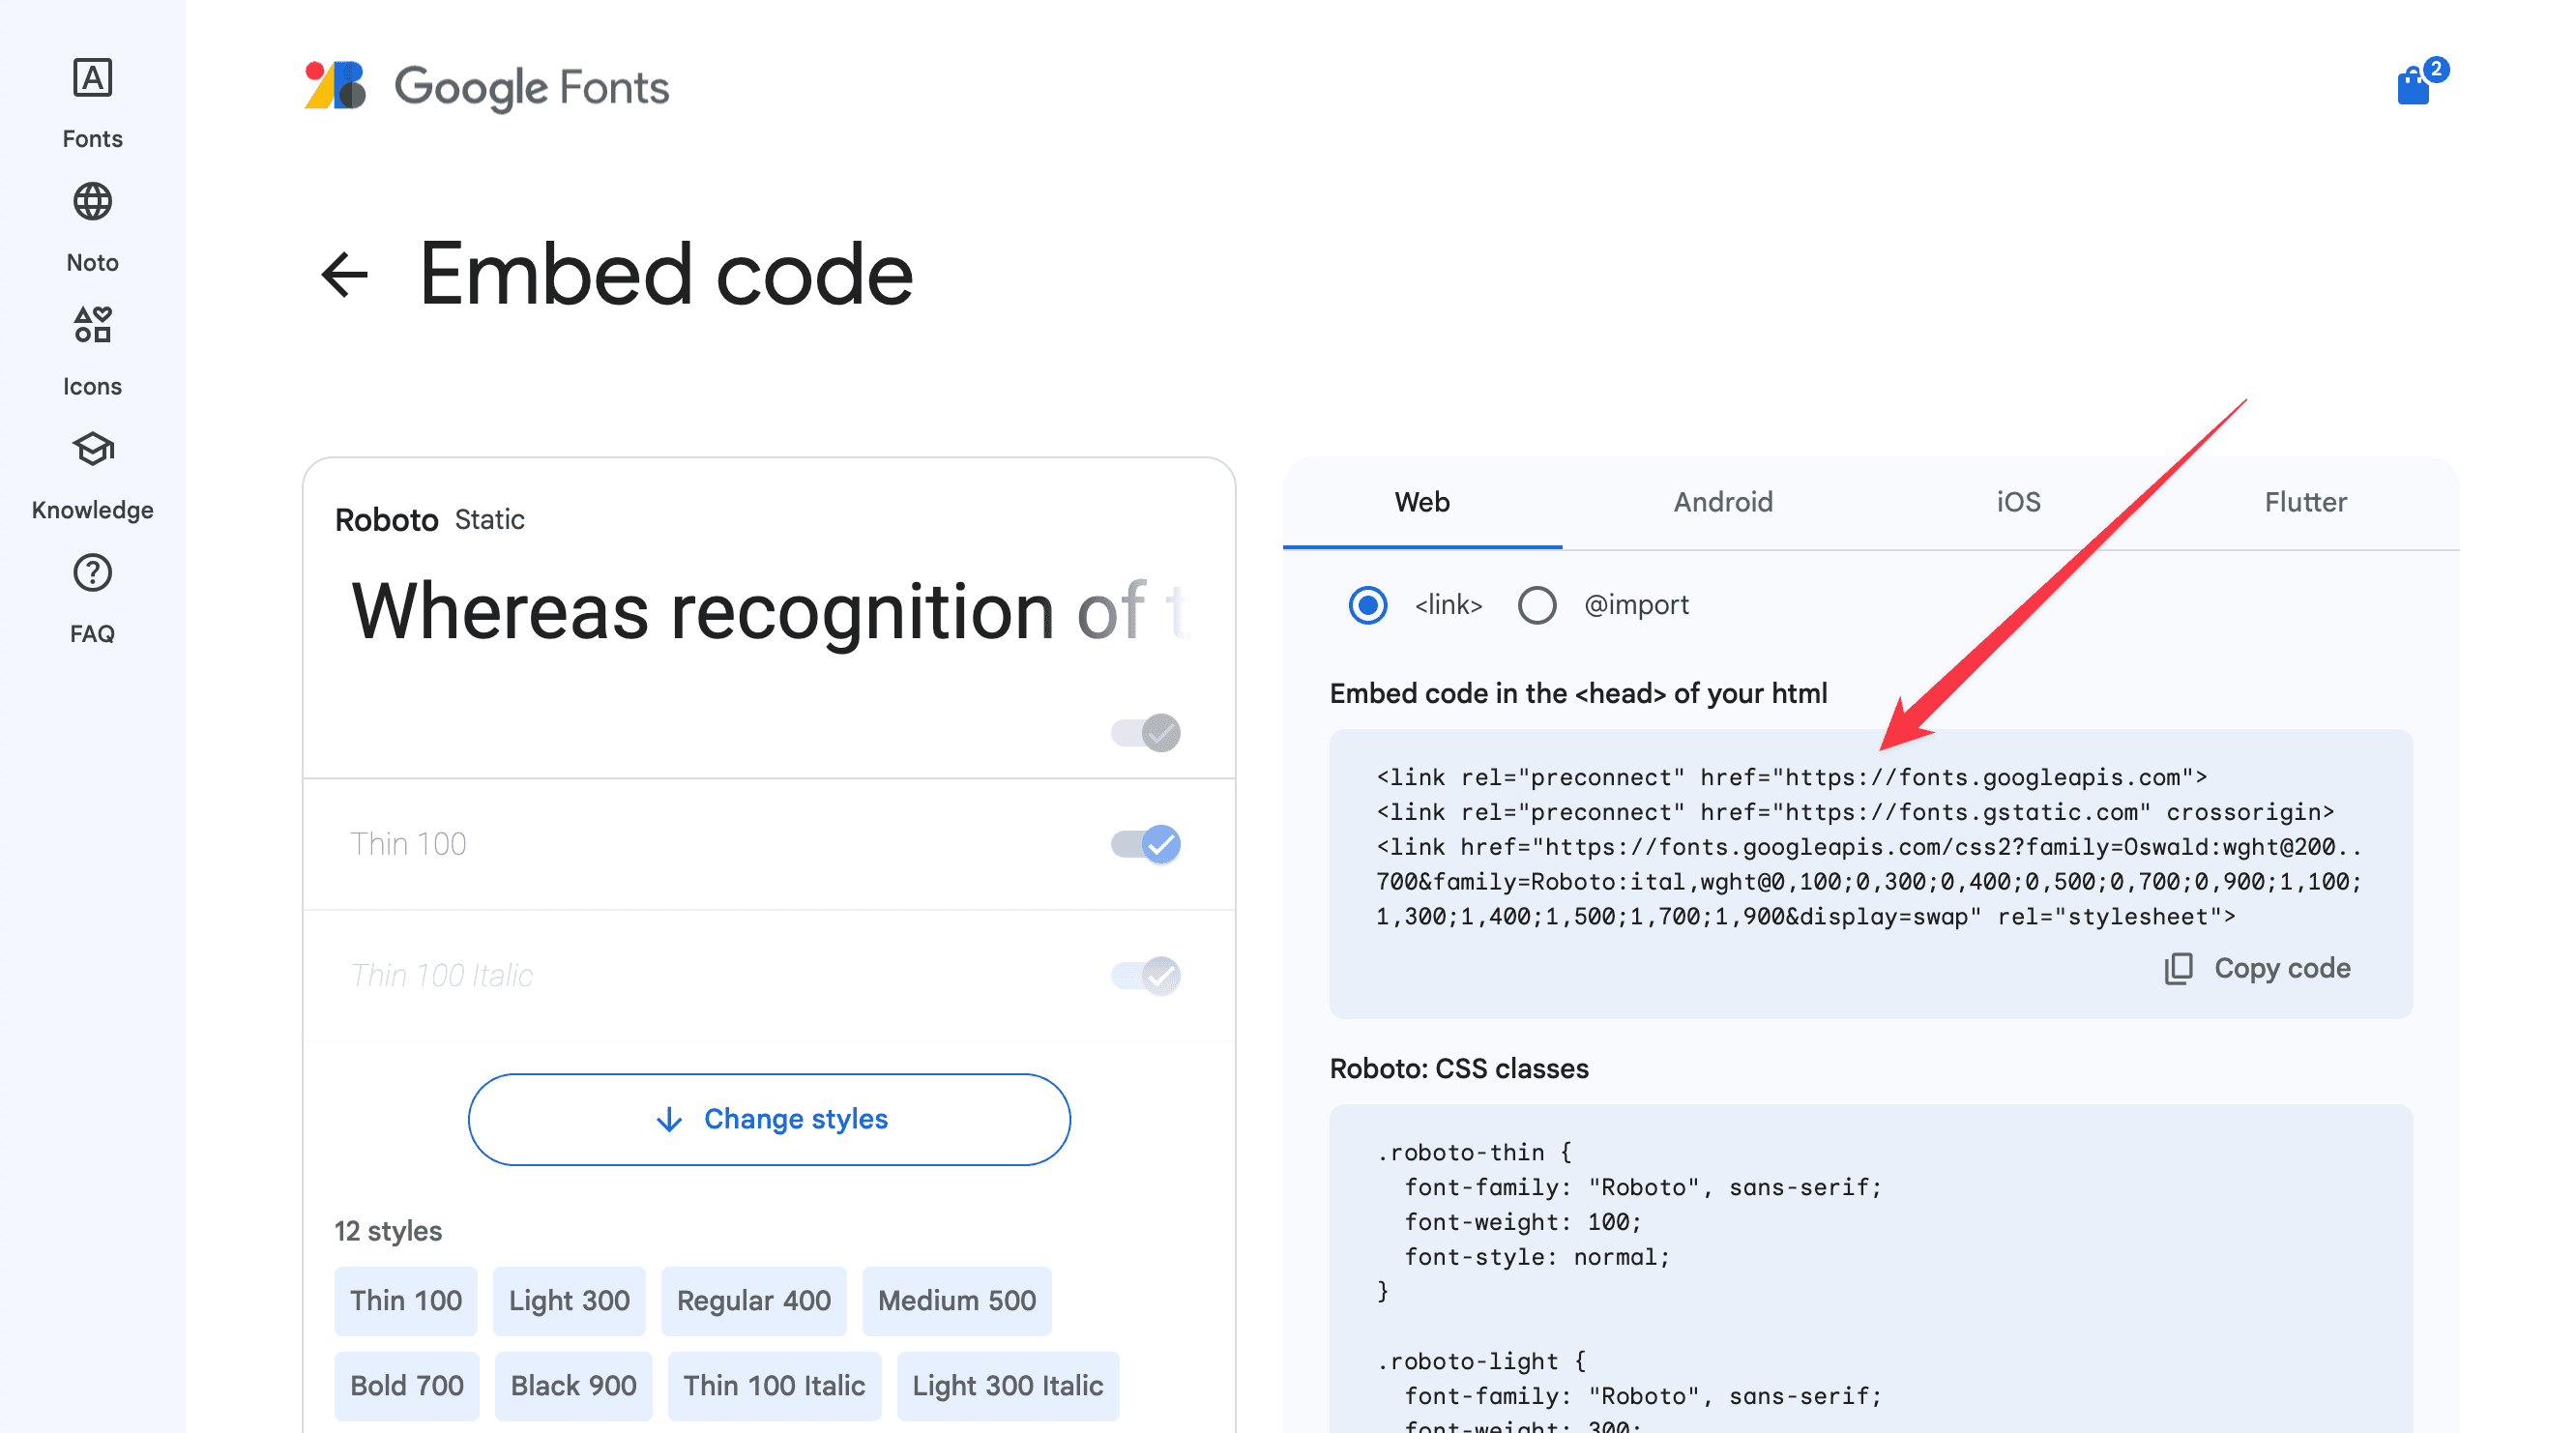
- Click on the Get embed code button

- Select the font weights and styles if you want and copy the code from the Web tab

Add the following CSS code:
<link rel="preconnect" href="https://fonts.googleapis.com">
<link rel="preconnect" href="https://fonts.gstatic.com" crossorigin>
<link href="https://fonts.googleapis.com/css2?family=Oswald:wght@200..700&family=Roboto:ital,wght@0,100;0,300;0,400;0,500;0,700;0,900;1,100;1,300;1,400;1,500;1,700;1,900&display=swap" rel="stylesheet">

<style>
  body {
    --gh-font-body: "Roboto", sans-serif;
    --gh-font-heading: "Oswald", sans-serif;
  }
</style>